X2WorkFlow Flow Actions
Flow triggers tell X2CRM when to do something. Flow actions tell it what to do. Like the flow triggers, the flow actions in X2CRM are each based on a module type in the broader software. The actions of the trigger will vary based on the attributes of the modules. Many of the flow actions allow you to update or filter by certain module-specific attributes
Add Comment
Add to List
Add to Newsletter
Assign Record
Change Record
Complete Process Stage
Conditional Switch
Create Action
Create Action For Record
Create Popup Notification
Create Record
Delete Record
Edit Tags
Email
Email Contact
Email Report
Post To Activity Feed
Push Web Content
Reassign Record
Remote API Call
Remove From List
Revert Process Stage
Send SMS
Slack
Split Path
Start Process Stage
Terminate Process
Update Record
Wait
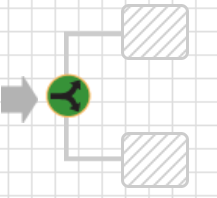
Conditional Switch
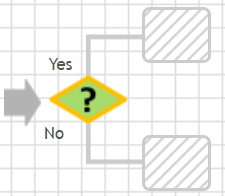

The conditional switch is a decision point in your flow. It sets an attribute filter that evaluates a specific parameter. It creates a forked path that will be followed based on whether the filter criteria were met or not. The top path is followed if the parameter requirements are met. The bottom path is followed if they are not met. The available attribute filters are dependent on the flow's trigger. That is, the module that the trigger references will determine which attributes you can compare.
In this example, when the flow reaches the Condition point, the flow will evaluate the field of Lead Score and if that field equals 10, then the flow will proceed on the upper leg of the flow. If Lead Score does not equal 10, then the flow will proceed on the lower path. This Condition Switch allows any workflow to be very flexible and you can design any number of Condition Switches into the workflow.
Remote API Call


This action makes a HTTP request to a URL of your choosing, of type GET, POST, PUT or DELETE. You can also include a request body by using the Add Attribute button to build a flat list of key-value pairs. This list will be sent to the remote URL as form data (mime type "application/x-www-form-urlencoded"). Note, the Value fields support formulas and variable replacement, so you can include dynamic data in the payload.
Create Action


With this flow item you can automate the creation of a new action for a user of your X2CRM system. Enter the details for the action, i.e. its subject, description, assignment, priority, and visibility, just as in the actions module. For instance, you may want to create a high priority public task to schedule a demo call every time a web lead comes in. You can then assign the task to individual users or to groups like your sales reps, in which case the lead will be assigned based on your lead routing rules. When creating the content of the action, you may also use dynamic variables based on the module type you're working within - i.e. which module your flow trigger is based on.
Post to Activity Feed


You can design a flow which will automatically post an item to the X2CRM activity feed. Set the post type (e.g. announcement) and enter the text of the notification. Specify which user's account the activity event will be posted from and whether or not the post will create a notification. When entering the content of the post, you may also use dynamic variables based on the module type you're working within - i.e. which module your flow trigger is based on.
Create Popup Notification


This flow item creates a pop up notification on a specific users page. Set who will receive the notification. Enter the message of the notification, highlighted in green. When entering the content of the message, you may use dynamic variables based on the module type you're working within - i.e. which module your flow trigger is based on. When the trigger parameters are met, the notification will pop up on the user's screen.


This flow item allows you to email a specific address (as opposed to email contact, which emails the record whose action triggered the flow). You can use the "send as" drop down menu to select the account to send the email from. Set up external 3rd party email accounts using the apps manager.


This Action allows you to send out reports via email automatically via a workflow. When used in conjunction with the Periodic Trigger, reports can be sent on a timed basis, such as every week or month. Define the Send from and who it will be sent to. You can use an existing email template for the body of the email or write a custom message. Next, choose which report to send via the drop down menu. Add any CC or BCC.
Add Comment


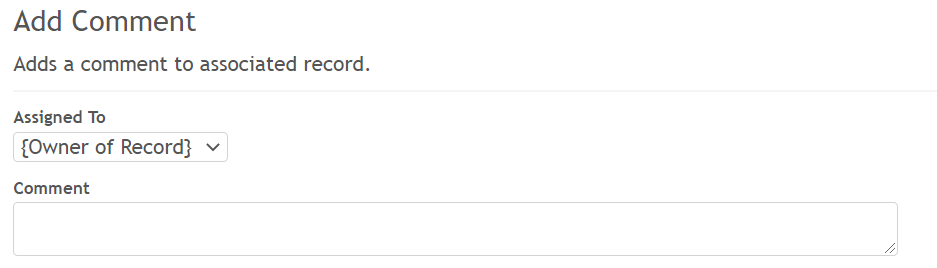
This flow item updates the record associated with the flow trigger and adds a comment to the page. Comments can be viewed in the interaction history widget on a contact's record page, shown below.
Create Record


Create a new record of any type. Add the attribute fields you'd like to include in the new record's page. Feel free to use dynamic variables associated with the record type and which are consistent with the module of the flow trigger. Be careful, though. Some record types have required fields, and if your flow fails to specify those fields the record won't be able to be made.
Create Action for Record


In contrast to the more sparsely titled Create Action, this flow item creates a new action associated with the record that triggered this flow. This means that if your trigger is, for instance, Tag Removed, then Create Action for Record will associate a new action with the contact whose tag has been removed. Enter the relevant details for the action, i.e. its subject and description. When creating the content of the action, you may also use dynamic variables based on the module type you're working within - i.e. which module your flow trigger is based on.
Delete Record


Permanently delete the record associated with the flow trigger. This action cannot be undone so proceed with caution.
Email Contact


Unlike its cousin, the more sparsely titled Email, the Email Contact flow action includes all email related fields except for the addressee (i.e. the "to" field). This is because this action automatically addresses an email to the record associated with the flow trigger. You can use the "send as" drop down menu to select the account to send the email from. Set up external third-party email accounts using the apps manager.
Add to List


Lists are lists of contacts that you can use to address marketing email campaigns or send newsletters to. X2CRM can create dynamic lists, which update their rosters automatically based on a set of feature criteria, or it can create static lists, which have stipulated and manually managed rosters. The Add to List function updates a static list by adding the contact associated with the flow trigger to a specified list roster.
Remove from List


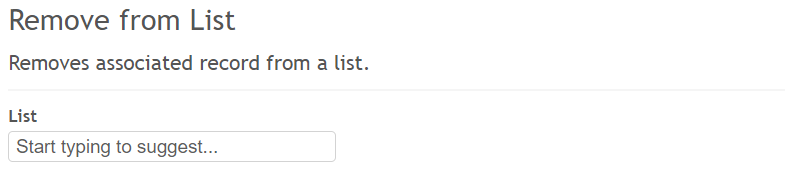
Lists are lists of contacts that you can use to address marketing email campaigns or send newsletters to. X2CRM can create dynamic lists, which update their rosters automatically based on a set of feature criteria, or it can create static lists, which have stipulated and manually managed rosters. The Remove from List function updates a static list by checking to see if the contact associated with the flow trigger is on a specified list roster, and if so, removes them.


This Action will Revert a Process Stage within the workflow. Choose what Process and what Stage and this Action will revert to the prior Stage. Any Comment included will go into the Detail comment in the Process.


This Action when included in a workflow with complete the specified Process Stage. A comment may be added which will be attached to the Process. This marks as complete the stage that is specified but does not start the next stage.


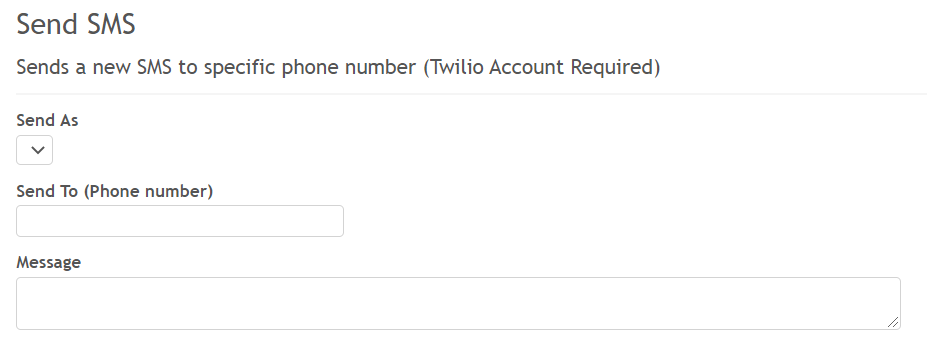
This Action allows you to send a text from within a workflow. Specify the phone number to send to and what the message will be. You must have a Twillio account to allow this to work.

This Action simply splits the workflow into two paths, both of which will be executed. This is helpful in designing long workflows.


This Action will attach the associated record to a specific list. This list has to be in existence and be a static list.


This Action will assign the specific record to a user in the system. The assignment may be done via the Lead Routing capability set up in Admin, as you see in this picture, or the drop down will list all the active users in the system and you choose what user will be assigned when this workflow is Active.


Workflows work on specific records that triggered the flow to start. There are times when it is valuable to be able to change the record to one that is associated with the original record. The drop down default is Original Record but the drop down will display those modules which have lookup fields associated with the original record. For instance, the workflow is originally working on a Contact record. You want to perform some function on the Account record which is associated with the specific Contact record. This action allows the workflow to point to the Account record associated with the Contact and perform additional Actions. After performing those Actions, the Change Record Action can be invoked again and return to the original record and continue the workflow.
Reassign Record

Records in X2CRM are associated with a certain users (i.e. your company staff). At certain times, you may need to change user associations with contact records. Use this flow action to do that. From the dropdown menu you can select specific users, assign it to Anyone (meaning whoever wants to can claim it), or use your lead routing rules to automatically pick a user to associate the record with.
Slack

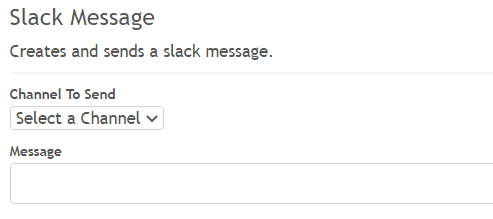
X2CRM can be configured to send a message to one of your Slack Channels. Before this action is selected, Slack Integration must be activated with the Manage Apps module in the User menu.
Once Slack Integration is activated, and the action is configured, X2CRM will send a message to the selected Slack Channel when ever the trigger occurs.


This Action performs as stated above, it Adds, Removes, or Clears tags to the associated record.
Update Record


Add attributes to update and specify their new value for that attribute's content. The available attributes are derived from the module that the flow's trigger is based on. The flow will automatically update the record of the relevant record. For example, the Contact Web Activity trigger will allow you to use the Update Record flow action to change the Lead Score attribute for that record. But the Action Overdue trigger would allow you to use the Update Record flow action to change the Due Date attribute.


This Action allows the workflow to start a specific Process Stage from within a workflow. You specify what Process and what Stage within that Process and when the flow gets to this Action the Process Stage will be started.


Terminates a Process from within a workflow. Specify the Process and when the flow reaches this Action the Process will be terminated.
Wait


Specify an amount of time for the system to wait before moving on to the next flow action. Enter an integer and specify the units of measure.
Push Web Content


The web content returned by this flow will replace the embed code when a visitor comes to your page. The content you put in this message can contain based on the visiting contact's record. The attributes can be things as varied as the contact's first name , the contact's assigned sales rep , or even their city . See the attributes section of this guide for more information on module attributes.
Need more help or answers? Just fill out this form and we will contact you!